One Image to rule them all
Listing Products - Order Forms - Product management
We need images for ERP, Excel order forms, Shopify, Amazon, TheBay and what not.
Image requirements might be: ERP 500x500, Excel Order Form 300x400, Amazon: 1500x1500, TheBay 984x1312 and Shopify (Dawn theme) 700x700.
We always need many types of images with different resolutions but do we need a set of images for each job? Or there is a smarter way that can save us time and remove repetitive work?
“Give me a place to stand, and I shall move the world” - Archimedes
We will be able to generate all these resolutions if we have as a solid base, a source image with the dimensions of 2000x2000px.
TLDR: Have the 2000x2000px images ready & use the image transformations using TwicPics. You can find this discussed at the end of the article, alongside with the files and the Resources section.
Workflow
improve image quality
organize folders and filenames
process images
organize images
Improve image quality
This is often times a necessary step, even if the picture has a good resolution. Because in few steps, we can de-noise, de-band and upsample the resolution.
For this, you can use Gigapixel from TopazLabs, Pixelmator Pro, Luminar Neo, Photoshop etc.
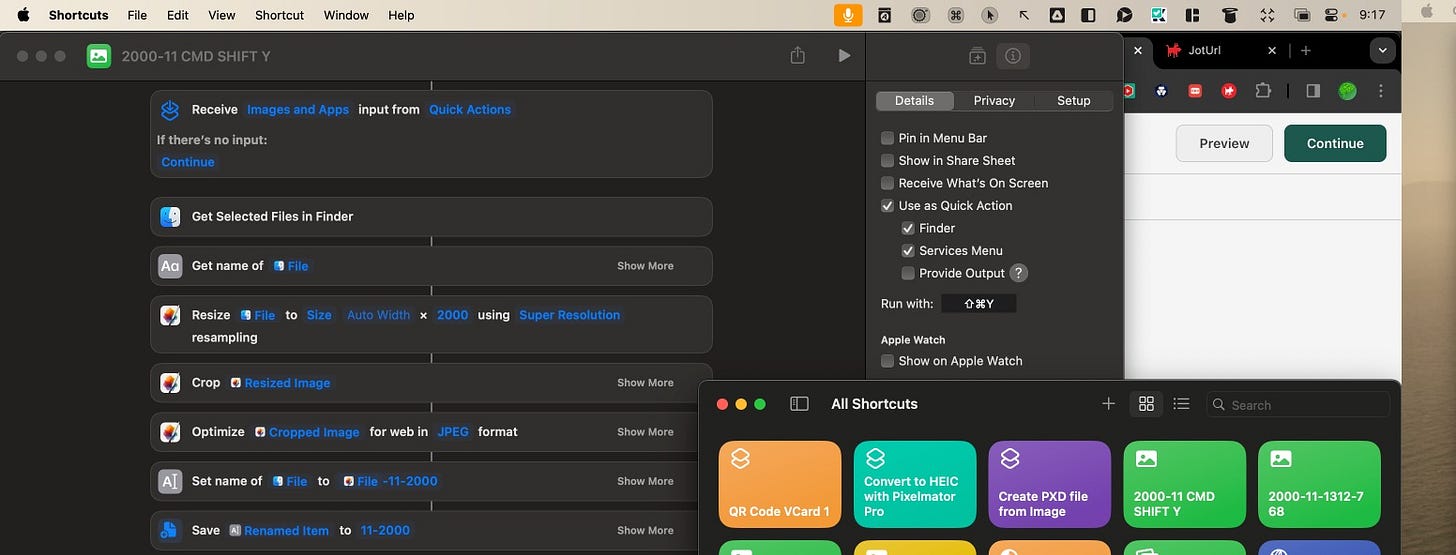
Personally, I created a Shortcut using “Shortcuts“, that is doing an automation using Pixelmator Pro (you can find the file in the Resources section):
resize the selected image to a height of 2000px with an auto width, keeping the proportions.
cropping the image to 2000x2000 (position center).
optimize the “Cropped image“ for Web in JPEG format, Quality 87.
add to the Initial file name “-11-2000”
save the Renamed file to a folder named “11-2000”
Organize folders and filenames
Folder structure: [Brand Name] / [“Image Ratio”-”Image Resolution”]
Example: Rolex/11-2000 (11 represents the image ratio, 2000 represents image resolution)
File structure: [SKU]-[“Image Ratio”-”Image Resolution”]_[“position”]
Example: ROL-11-2000_front.jpg
The most important thing in automation workflows is consistency.
Position can have these values: front, side, back, detail, social, box.
Image ratio can be 11(1:1), 34 (3:4) etc
Process images
In order to be able to automate all these image ratios we can use URL transformations using one of these services:
Cloudflare Images ($5.00 per 100K images stored per month, $1.00 per 100K images delivered per month), Cloudinary (it’s complicated 😅), TwicPics (Free 3GB & unlimited transformations / Paid: $19/month).
You can read about how to do URL transformations using Cloudflare, using Cloudinary and using TwicPics.
In practice, the price doesn’t matter and you can use any of them, because you use them only at onboarding, without public access. Therefore, we will do our pick based on speed, flexibility and convenience.
Ok, will do the demo using Cloudinary and TwicPics.
Produce the images using Cloudinary
Actually, this is the hardest choice, because they are a bit API oriented and the UI is not making simple all the operations, but I will present it to you just because ... Maybe you like Cloudinary 😅
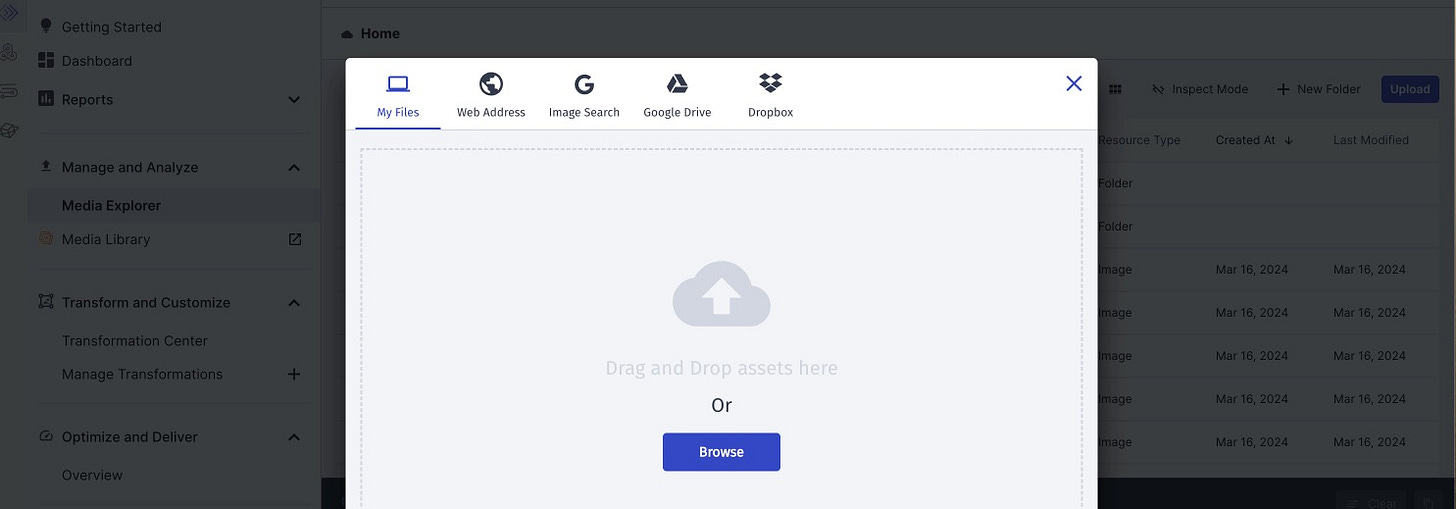
Upload images to Media Explorer (hint: tag them); use a common prefix for all the images or batches - we will call them using parts of their name that is common to all of them.
We can go to the Media Library and copy the link to the images, one by one.
Or, we can retrieve them programmatically, using the terminal.
Generate the Access keys from your Profile. Note your cloud name and the prefix of the requested images.
Note that curl and cld commands are doing the same thing - I just offered you two options.
curl https://<API_KEY>:<API_SECRET>@api.cloudinary.com/v1_1/<cloud_name>/resources/image/upload?prefix=cld > list.json
If you are into Cloudinary, you can even install their command line interface (CLI)
pip3 install cloudinary-cli
export CLOUDINARY_URL=cloudinary://<API_KEY>:<API_SECRET>@<CLOUD_NAME>
cld admin resources type=upload prefix=cld > list.json
We now have the list of file urls in this json file and we need to extract these urls somehow. For this, you can use an app like JSON 2 ++ or DevUtils.
If you don’t have them handy, you can use ConvertCSV or Gigasheet.
Once you have this csv file, you just have to remove the versioning, in this case, remove the “v1710562444” part of the url
http://res.cloudinary.com/gwcacloud/image/upload/v1710562444/cld-sample.jpg
So we end up with an url like this:
http://res.cloudinary.com/gwcacloud/image/upload/cld-sample.jpg
Cloudinary URL transformations
I don’t know if you make it up to here, but we need a coffee, right? ☕️
I don’t know how you can keep reading … I’m bored to death 🤣🤣🤣
Break the initial URL in two pieces and insert in-between a new column so we can form the final url by concatenating the transformation part in the middle.
COL A (root URL): http://res.cloudinary.com/gwcacloud/image/upload/
COL B (transformation): t_s760-r34-p20-p20-q90
COL C (File name): cld-sample.jpg
Final URL: https://res.cloudinary.com/gwcacloud/image/upload/t_s760-r34-p20-p20-q90/cld-sample.jpg
Note that in this case, q90 is optimizing the jpeg to a quality of 90.
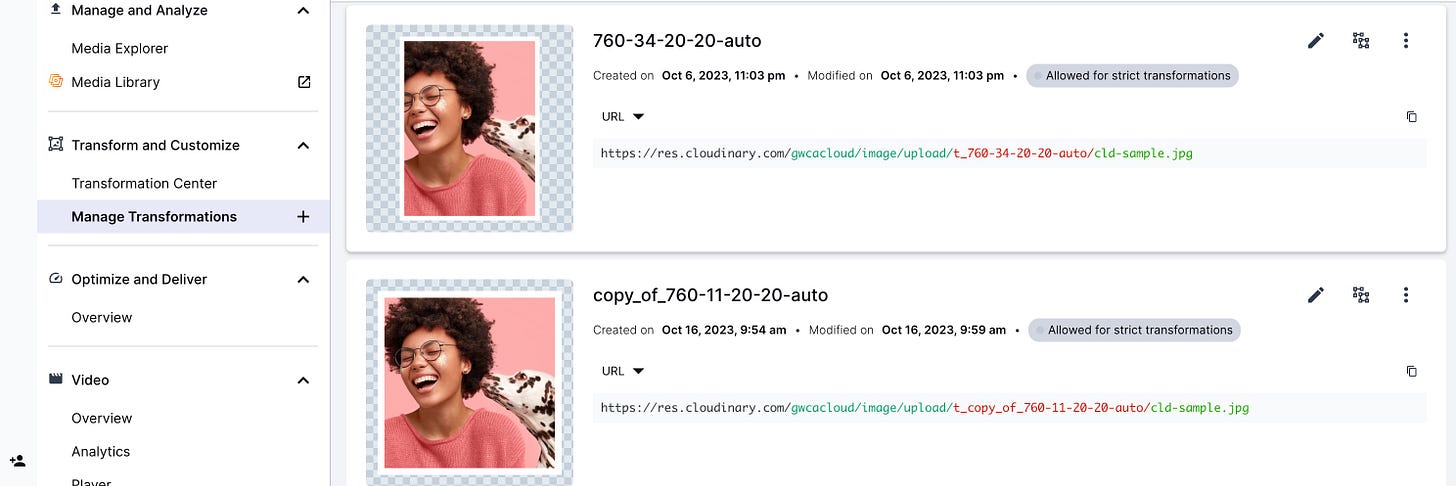
760-11-20-20-auto
https://res.cloudinary.com/gwcacloud/image/upload/t_copy_of_760-11-20-20-auto/cld-sample.jpg
In the first transformation, we want to generate an image of 800x800px (1:1 ratio), with 20px padding (white space) - let’s say that we wanted to make sure that we have at least 20px white all around.
Transformation steps: Fit to 760px, Crop to 1:1 (a bit useless),Quality auto, Add a 20-pixel wide white border to the image.
760-34-20-20-auto
https://res.cloudinary.com/gwcacloud/image/upload/t_760-34-20-20-auto/cld-sample.jpg
In this second transformation, we want to generate an image of 610x800 (3:4 ratio), with 20px padding (white space) - let’s say that we wanted to make sure that we have at least 20px white all around.
These are the transformation steps: Fit on Height to 760px, Crop using Ratio 3:4, Quality auto, Add a 20-pixel wide white border to the image.
Get all Images for the desired sizes
Once the links are constructed in Excel, we just have to feed these links to a Download manager like Downie or jDownloader, in order to download them all.
Remember … the whole point of all this was to make your life easier with product onboarding into your ERP or for product listing. So this download is for backup purpose. In the onboarding process we will actually use the links 🔗 🥳
TwicPics URL transformations
Follow this setup guide and Create an account with TwicPics, create a workspace.
Please note that I added the “cb-11-2000” - this is simply to have this value in the resulting urls so I can understand that this link is for a square image with a size of 2000px.
For the Source URL, I added the same and that means that in the R2 bucket, we actually have a directory called “cb-11-2000”. Why? Because maybe we want to host different types of source images. Perhaps next month I will host a new brand called Rolex and I will need source images of 3000px; in this case I might create a directory called “RX-11-3000”.
Go to Cloudflare R2 (Zero Egress Fee Distributed Object Storage) and make a bucket (the Source URL from the previous imagine is actually the R2 Public bucket).
Get your Account ID and API Tokens.
Go to the bucket settings, enable the Public access and copy the Public R2.dev Bucket URL.
Edit CORS policy and enable access from your TwicPics subdomain
[
{
"AllowedOrigins": [
"https://subdomain.twic.pics"
],
"AllowedMethods": [
"GET"
]
}
]
Fire up Filezilla Pro or whatever else you use in order to connect to Cloudflare R2 and enter your Account ID, Access Key ID and Secret Access Key.
If you need help configuring the connection to Cloudflare R2, follow this guide.
Once this is done, you can directly upload the source images to the chosen R2 directory.
Fun with Excel
Please note the TwicPics url transformations.
Let’s say that we want to have product images in excel, with a ratio of 3:4 and a size of 300x400px, without inserting them.
We want the images to appear once we enter the product name/sku.
Go to the second sheet (Sheet2) in excel and make the following formulas:
A2: =IMAGE(H2)
B2: ASM-0138
C2: https://cbrands.twic.pics/cb-11-2000/
D2:
E2: '-11-2000_frontc
F2: =F1
G2: '.jpg?twic=v1/cover=3:4/resize=300/resize=300x400
H2: =CONCATENATE(Sheet2!$C$2,Sheet2!B2,Sheet2!$E$2,Sheet2!$G$2,"&v=",Sheet2!$F$2)
Go to Sheet1 in excel and enter:
A2: ASM-0005
B2: =IFERROR(IMAGE(CONCATENATE(Sheet2!$C$2,A2,Sheet2!$E$2,Sheet2!$G$2,"&v=",Sheet2!$F$2)),"")
Drag the B2 formula all the way down to the next 300 cells, or whatever products you have. While you do that, only the A2 will change, the other values are locked to The second row from Sheet2 so this will change in fact just A2, A3 etc; since in Col A you have the product name, this will be the only changing part from the newly generated url.
Ok, what’s the logic?
In Sheet2 we have setup the URL forming logic and we place it into the Sheet2, in order to be out of sight.
Let’s dissect the URL that formed in Col H:
https://cbrands.twic.pics/cb-11-2000/ASM-0138-11-2000_frontc.jpg?twic=v1/cover=3:4/resize=300/resize=300x400&v=4
https://cbrands.twic.pics/cb-11-2000/ASM-0138-11-2000_frontc.jpg is the original file, hosted on R2
twic=v1 is the API version, no need to touch that
cover=3:4 is cropping the original file in the 3:4 ratio
resize=300 picture is vertically resized to 300px
resize=300x400 image is resized to 300x400 (unnecessary)
There is an interesting restriction in using TwicPics - in the free version, there is no cache purging nor Purge by asset (Enter the URLs of your assets to purge them from the cache.)
What that means? Since their cache life has the duration of 1 year, if you update any file in R2, there will be no update on TwicPics and you will see the old cached image.
That’s why, every time you update an image on R2 (keep the same name) you need to increment the value of F1. This will increment the query string of versioning.
Using this technique, assets will be invalidated from both the CDN and the browser caches.
Now, that you learned how to do links for whatever image sizes you could possible need, you can use these links whenever you need to onboard products or need images in an Excel file.
I hope you enjoyed the article! Please find the Resources on this link.


